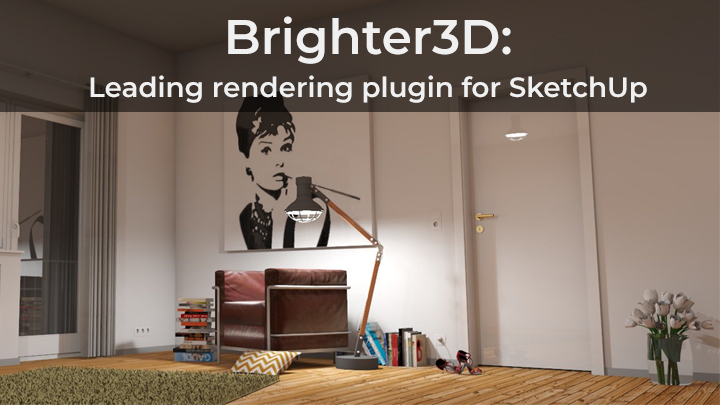
Brighter3D is a rendering plugin for SketchUp. Check out detailed information.
In series of technical interviews, The Virtual Assist recently conducted interview of Łukasz Piwowar, CEO of Brighter3D. Given below are the extracts of it.
I like to think that Brighter3D is my third child (I have two daughters).
I spend almost 9 years developing and growing Brighter3D into a really useful and easy to use rendering plugin for SketchUp.
When I was doing my Ph.D. study on realistic computer graphics, I started using SketchUp as my favourite 3D modelling program. I was testing rendering plugins that existed at the time but none of them really met my expectations, so I decided to create a new one.
The one thing that especially frustrated me the most when using them was the noise. Even when they supported progressive rendering, the preview they created was totally unusable (there were literally holes in the images because of the noise). My idea was not to create another bi-directional path tracer, my goal was to create a correct, noiseless solution. After completing my Ph.D. I started to study all the existing noiseless rendering methods and eventually created my own. This is how Brighter3D was born.
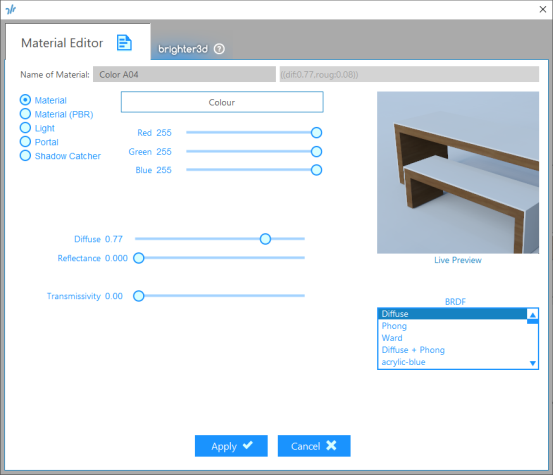
My second goal was to create as simple user interface as possible. This happened after I saw the first iPhone presentation by Steve Jobs, I was totally shocked. The main idea is to hide all user interface as long as you do not need it. For example when you open material editor you see only color settings and 3 sliders (diffuse, reflectance and transmissivity). When you decide your material should reflect anything, additional settings are shown like roughness, fresnel and metal. Because of that users are not intimidated from the start, but have access for advanced settings if they need it. The other idea is a material preview. What is new about this is that it shows a live preview on real objects, with real lighting conditions. Other programs use box or sphere and one or two point lights. The problem is when you render it, it looks totally different from the preview. Brighter3D allows you to see the object as it will appear on the final image. You can also zoom in/out preview and pan it. Brighter3D does not use Units in user interface for simplicity. You just set up light power as an integer value.
What is Brighter3D?
Brighter3D is a fast and easy to use photo realistic rendering plugin for SketchUp that creates images without noise from the beginning. It is completely integrated with SketchUp and works totally internally. I think it is one of the fastest, if not the fastest, CPU renderer on the market.
How does Brighter3D stand apart from it’s competition?
B3D uses unique noiseless progressive technology.
You get a (usable) preview in seconds and a perfect finished image in minutes. With other rendering programs, even when they support progressive rendering, you usually get a noisy image, and you need to wait hours for the noise to disappear. Because Brighter3D is made for SketchUp, it exports scenes very fast and you start rendering almost at once. When you change the camera view you do not have to re-export the scene, you just open the rendering window and press the refresh button and the different camera views are rendered. In most cases it is temporally stable, that means when you compute an animation it does not flicker or change intensity of colors between the frames.
What are the major features of Brighter3D? Please explain each in detail.
- Artificial area lighting, you can turn any material/object into emissive surface as it is in real life. You can model spotlights, neon lights, lamps, or use a texture as a light source. You can also change color, power and light temperature in Kelvins.
- Daylight that uses SketchUp settings to perfectly match the suns position and sky at the given time, date and object position in the real world. Additionally you can change the sky turbidity value.
- HDRI Lighting, allows you to use real life 360 HDR maps as a light source and/or reflection source. You can also use “shadow catcher” material to catch all shadows on given maps to improve the realism.
- Ambient Occlusion is another rendering possibility. It basically computes the percentage of occlusion at any given point. It is the simplest (one click solution) because it does not require you to setup any light in the scene. It does support all material properties like reflectance, transmissivity and so on.
- Depth of field camera mode simulates camera lenses and allows you to focus on one part of the image getting everything else into out of focus blur.
- Real-time material preview: you start rendering, then go into material editor and what you see is basically part of your final image, you can pan and zoom preview window, that allows you to setup materials one after another with great precision.
- B3D generates images in full high dynamic range HDR format (.hdr, .exr), you can view them in original if you have a TV or monitor that supports HDR. You can also save them in regular LDR format like .jpeg or .png using one of the 5 tone mappers that will convert them.
- You can use 360 degree camera rendering mode to create HDR maps for Virtual Reality of facebook or other platforms that supports 360 degree views.
- You can compute camera fly by animations, using camera position in tab views as keyframes.
There must have been so many technical challenges during development of Brighter3D. Which were major ones and how have you resolved them?
There were a few challenges. The main problem was to support as many versions of SketchUp and Windows as possible. From the Version 3.0.0 we support only the 64bit versions of SketchUp (2017 and newer), that allows to use all computer memory. We recently also abandoned the old C++ SketchUp API for the newer and much faster C one. The main challenge was the method itself, it is much easier to write scientific paper based on several test scenes, than implement reliable solution used by thousands of people.
Which programming language(s) are the backbone of the software?
97% of the code is C/C++, the rest is Ruby which uses SketchUp API.
Does Brighter3D support 360 degree cameras and VR?
Yes it does. Actually it is very simple, you just setup your camera position, change camera type to 360 degrees and press the render button. The saved images have proper EXIF information that allow them to be recognized as 360 images by many different programs and platforms.
You can check sample 360 Brighter3D rendering here:
https://roundme.com/tour/386363/view/1331088/
Why only for SketchUp? Does it support other industry standard leading 3D software?
I love SketchUp, I was learning many different 3D modeling programs and found SketchUp the easiest one. The second reason I made this for SketchUp is that there is no built-in rendering system into SketchUp itself, so there is a great market for good ones. At the moment it is SketchUp only, in future who knows …
What is the benefit of CPU rendering over GPU rendering?
It is all about accessibility and reliability. It is very hard to make sure the user has got the correct GPU card, correct version of drivers installed and correct version of CUDA or OpenCL. Even when all of this is confirmed there still may be problems and unexpected bugs with GPU code execution.
In the case of CPU it is simpler: installer check if your CPU supports SSE3.1 instruction set, if it does it will install and you can be sure it will work without any problems. If you have a decent processor with 4 cores (8 threads with hyper threading) or more it will be really fast, and a GPU setup that can beat it in terms of speed may cost a lot lot more.
It is also harder to implement complex algorithms on GPU, because it is fastest with repeatable code without a lot of branches like simple path tracing
Kindly explain production pipeline of Brighter3D and SketchUp.
B3D has got one window at a time user interface design that means when you go into material editor, the rendering window is closed but it continues to render in the background. So you can continue to model your scene while the render is computed, you can take a look at it by pressing render button again. You can open it at any time into “effects studio” window that allows you to use different tone mapper (the algorithm that converts physically based values into red, green, blue screen pixels in range 0..255), add additional effects like bloom or vignetting and save your image while it computes.
The basic pipeline is to open or create your SketchUp scene, add lights or turn on daylight or use HDR map for lighting, then press render button. You can adjust and fine tune materials while it renders.
![]()
The main toolbar is very simple, and contains only 7 buttons:
- render
- settings
- material editor
- material picker (pipette)
- effects studio (for post processing)
- plus button to save view tabs (or camera keyframe for animation)
- heal tool, to fix wrongly oriented faces
Who helped you in this journey of Brighter3D so far?
The icons and most of the user interface look was made by Bogdan Șușală, everything else was made by myself (Łukasz Piwowar). I also get a lot of support and help from b3d users, especially from Daniel, Tomasz, Ervin, Evan, Jay, Andrew, Marta, Johan, Julie, Helen, Jozsef, Richard, Surya. I love to hear user feedback and implement features they need.
I always remember who I make the program for.
Which new features of Brighter3D can we expect in the upcoming version?
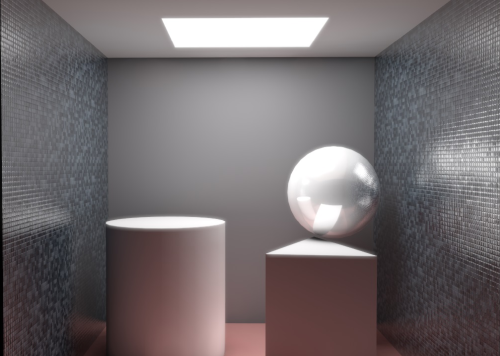
Because you now can set up fixed reflectivity, roughness etc. for whole object materials, we are working on PBR (Physically based rendering) materials, that will allow the user to use special textures for specular, ambient occlusion, normal maps, displacement maps and so on. At the moment this feature is in beta stage (in version 3.1.1) but it already gives a huge boost in terms of photorealism.
Sample rendering with PBR material on the walls:
The next step is to implement a classical (noisy) method with artificial intelligence denoiser, and compare it with the current method. If it shows to be fast enough it may also get added to the product.
We are also working on a new GPU based product that will allow to make really complex post processing effects on rendered images in real time. So please save your rendered images not only as a .png and .jpg but also as .exr and .hdr. You will then be able to process them later when the addon appears.
As now we have ‘pay once use forever’ business policy (all Brighter3D PRO upgrades are and will be free), post processing addon will be subscription based (with small fee). We are also working on the Mac OS version of Brighter3D (a lot of you asked for it).
You can watch 2018 students renders with Brighter3D here:
Also please visit our homepage: